
☰ Manual index
- PZone ERP website
- Installing the app
- Creating a new account
- Signing in to an existing account
- After signing in: the interface
- Browsing the company directory
- Join invitations
- Creating a company on PZone ERP
- Roles and permissions
- Company qualification profile
- Vendor assessment
- Individual assessment
- Self-assessment
01 PZone ERP on the web
You can reach the platform directly from your browser at the following link:
https://app.engimindai.com/
02 Installing the app on your device
PZone ERP is a web app (PWA) that you open straight from your browser — no download from any store. You can also “install” it on your device so it appears as a standalone app icon that opens full-screen and faster.
On Windows (Chrome or Edge)
- Open
https://app.engimindai.com/in Chrome or Edge. - At the end of the address bar, click the install icon (a small screen with an arrow) — or from the ⋮ menu choose Install PZone ERP.
- Confirm by clicking Install — an icon appears on the desktop and in the Start menu.
On Mac (Chrome or Safari)
- Chrome: same steps as Windows — the icon in the address bar, or the ⋮ menu ← Install app.
- Safari: click the Share button (a square with an up arrow) in the toolbar, then choose Add to Dock.
On Android (Chrome)
- Open the link in Chrome.
- An Add to Home screen banner may appear at the bottom — or from the ⋮ menu choose Install app.
- Confirm — a PZone ERP icon appears among your apps.
On iPhone and iPad (Safari)
- Open the link in Safari specifically (installing won’t work from Chrome on iOS).
- Tap the Share button (a square with an up arrow) at the bottom.
- Scroll and choose Add to Home Screen, then Add.
03 Creating a new account on PZone ERP
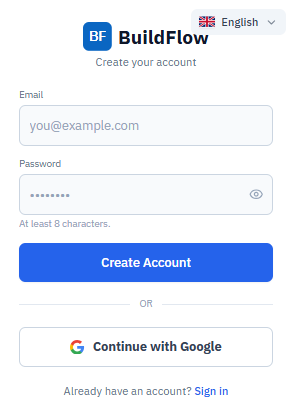
You have two ways to create your account — by email, or via a Google account.
Method one By email
- Choose your language from the language switcher.
- Click Create an Account.
- Enter your email.
- Enter your password (at least 8 characters).
- Click Create Account.
Method two Via Google
- Choose your language from the language switcher.
- Click Continue with Google.
- Follow Google’s instructions as they appear.
04 Signing in to an existing account
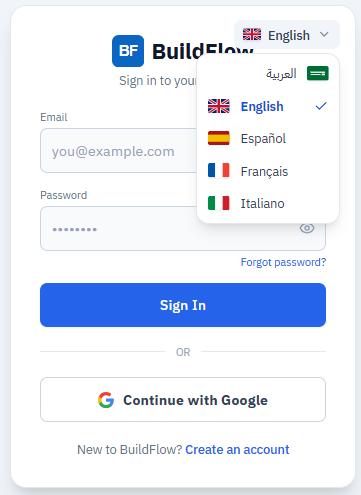
After choosing your language, sign in with one of the two methods.
Method one By email
- Enter your email.
- Enter your password.
- Click Sign In.
Method two Via Google
- Click Continue with Google.
- Follow Google’s instructions as they appear.
05 After signing in: getting to know the interface
As soon as you sign in, PZone ERP grants you the Candidate role automatically. The interface consists of a top bar and a side menu.
The top bar

It consists of the following:
- Side-menu icon
- To expand or collapse the side menu.
- The Candidate role
- The role PZone ERP grants the user automatically upon signing in.
- Language switcher
- Choose the interface language.
- Theme switcher
- Switch between light and dark mode.
- Create a Company
- A button for the user to create a company on PZone ERP.
- User identity
- The email you signed in with (or your name if you registered it) along with the first letter of your name or your photo.
- Logout
- To log out of PZone ERP.
The side menu — your profile
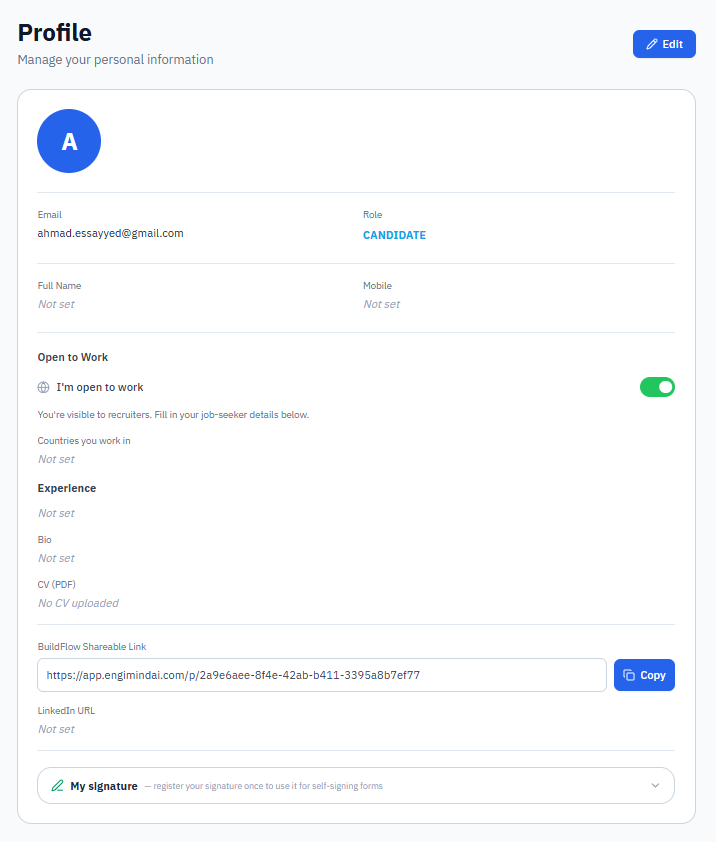
Click Edit to edit your profile, then:
- Click Change Photo to choose a photo of yourself.
- Write your full name in the Full Name field.
- Enter a landline or mobile number, taking care to include the country code.
- Turn off I'm Open to Work if you don’t want recruiters to find you on PZone ERP.
- Choose all the countries where you can work, if you want recruiters there to find you.
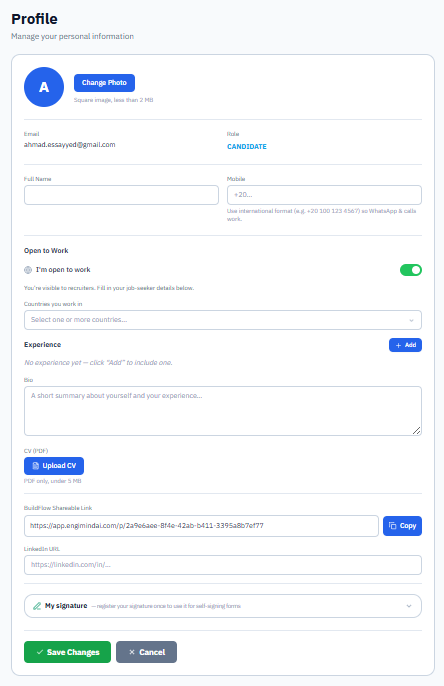
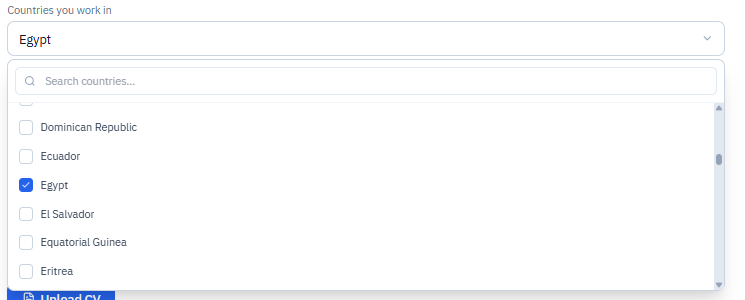
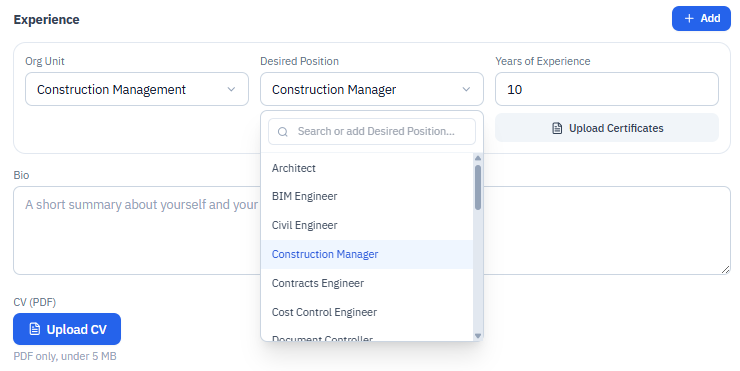
Present all your experience through Experience
Click Add to add an experience, then fill in the following fields:
- Org Unit
- Choose the org unit, department, or engineering discipline you excel at.
- Desired Position
- The job title you have held and hope to hold in the future.
- Years of Experience
- The number of years of experience in this job title.
- Upload Certificates
- Upload documents evidencing that experience.
- Bio
- A short summary of you and your experience.
- Upload CV
- Upload a copy of your CV (PDF).
- Copy
- Copy your unique link on the platform to share it via social media so people can find you through it.
- LinkedIn URL
- Paste your LinkedIn link so recruiters can find you there.
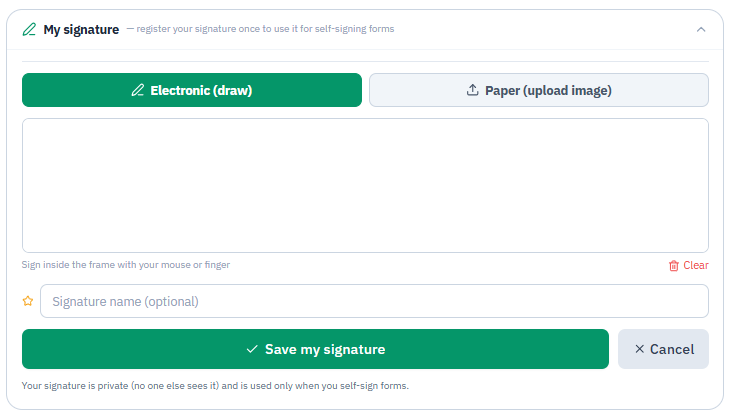
Register your unique e-signature
Click Register your Signature to open the signature registration form:
- Electronic (draw)
- Signing with a digital pen on your computer or phone screen.
- Paper — Upload Image
- Uploading an image of your signature; PZone ERP sharpens it and removes visual noise.
- Clear
- Remove your e-signature.
- Save my Signature
- Save your signature in PZone ERP.
- Save Changes
- Save all profile entries.
06 Browsing the company directory
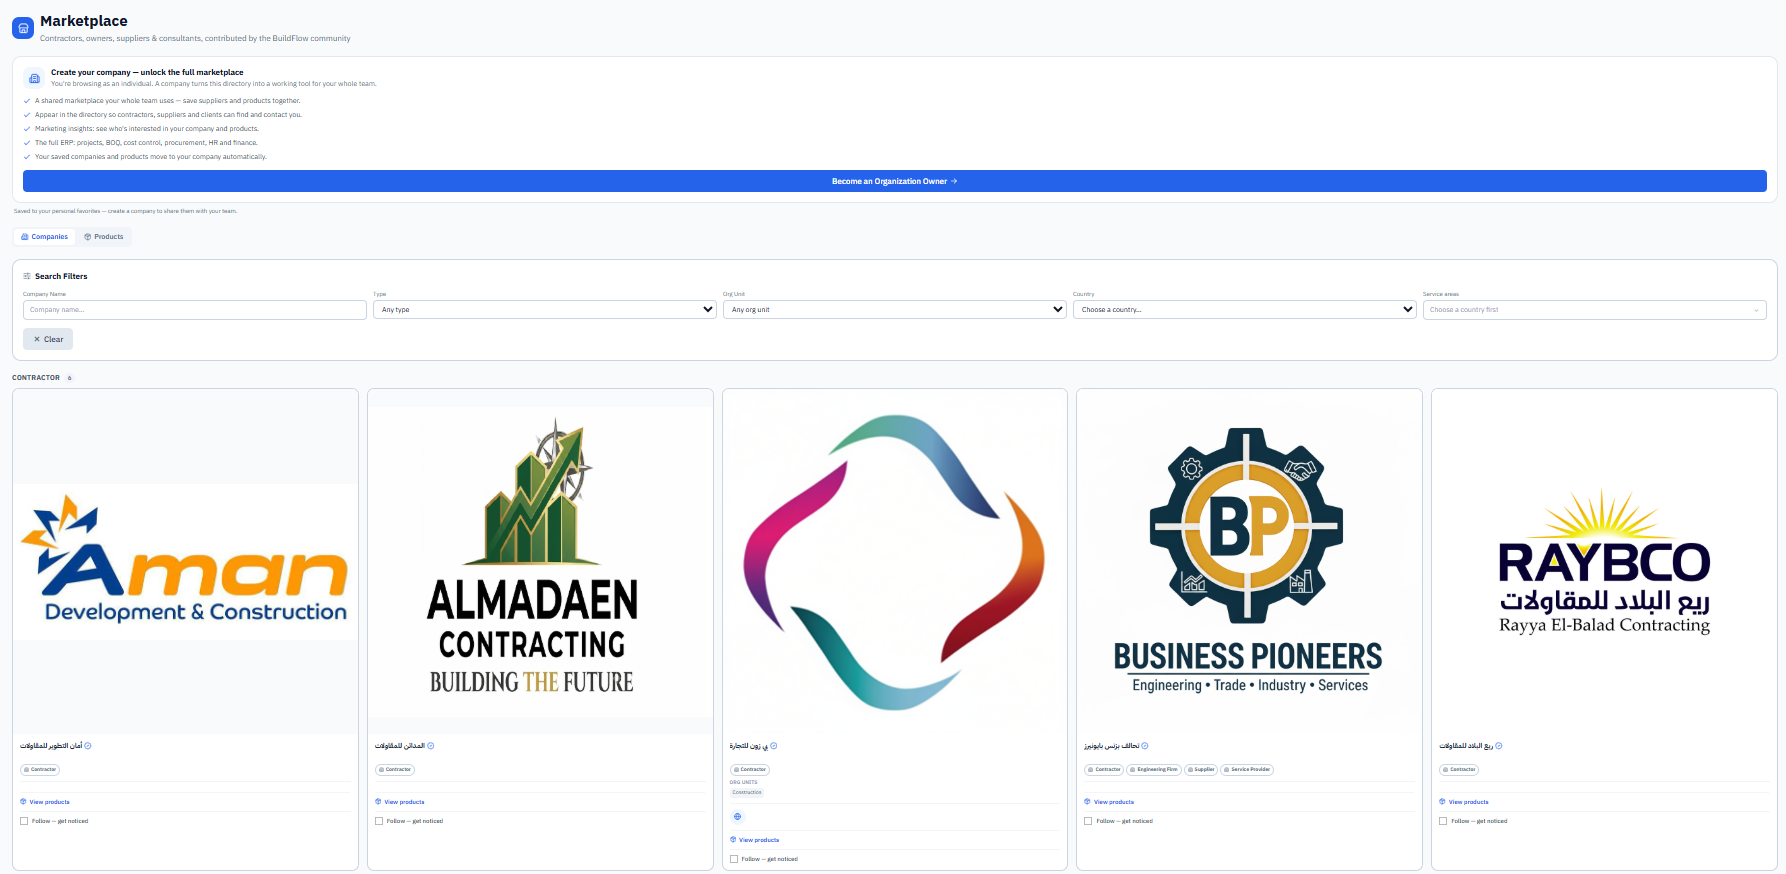
A user with the Candidate role can browse the company directory in one of two ways:
- Direct browsing to look through companies one by one.
- Filtered search via Search Filters, to filter companies by name, activity, specialty, country, a specific region within a country, or any combination of these filters.
In all cases you can follow a company, view its products and services, and follow some or all of them — and then a link to your profile is sent to it automatically, so the two of you can get in touch at any time.
07 Receiving invitations to join companies
One of PZone ERP’s greatest benefits is the seamless way it introduces users to companies and vice versa. After filling in your profile, browsing the directory, and reviewing each company’s products, you can follow the companies whose work interests you and follow their products — and then the companies get to know you, visit your page, and reach you via WhatsApp, email, and phone, and can send you job offers either to collaborate on a specific project or for permanent hiring.
When an invitation reaches you it appears on this page, where you review it and match the job offer against what was agreed during your conversation, then:
- ✅ Accept the invitation
- You join the company electronically as a “Viewer” initially, then the company owner or admin raises your role to suit your job (see section 09, “Roles and permissions”).
- ✋ Decline the invitation
- The electronic contact between you ends, while you both remain on PZone ERP until a new collaboration opportunity arises.

08 Creating a company on PZone ERP
A user with the Candidate role can promote themselves to a company owner (Owner) and register their company on PZone ERP in a single step. The form is split into four cards — we go through them card by card.
How do you reach the page?
Click the Create a Company button in the top bar (or from the company switcher if you aren’t a member of any company, or from the welcome banner in the Marketplace). The Create my Company page opens — “register your company on PZone ERP in a single step.”
Card one · Basic data and classification
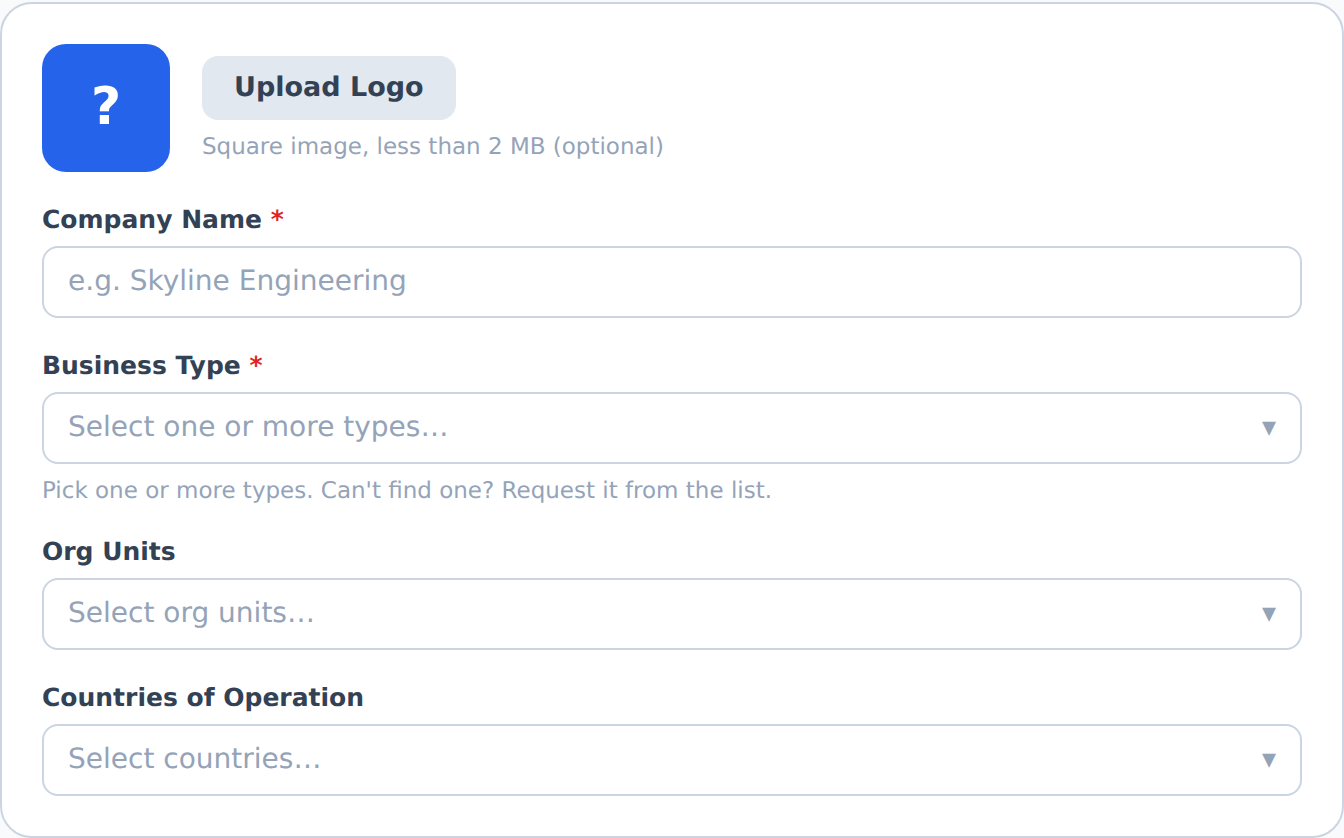
- Upload Logo (optional)
- Upload the company logo — a square image under 2 MB. If you don’t upload a logo, the first letter of the company name appears as a temporary icon.
- Company Name *
- The company name — a required field.
- Business Type *
- Choose one or more business types (required). Can’t find your type? Request it added from within the same list via Request it, and your request is sent to the platform for review.
- Org Units
- The org units / engineering disciplines your company works in.
- Countries of Operation
- The countries where the company operates.
Card two · Contact details
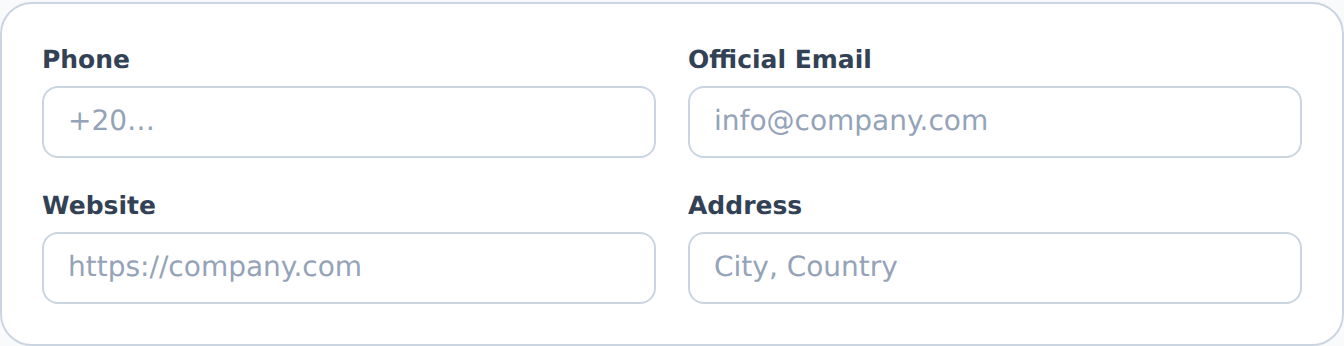
- Phone
- The company’s phone number with the country code.
- Official Email
- The company’s official email.
- Website
- The company’s website.
- Address
- The address (city, country).
Card three · Legal identity (optional)
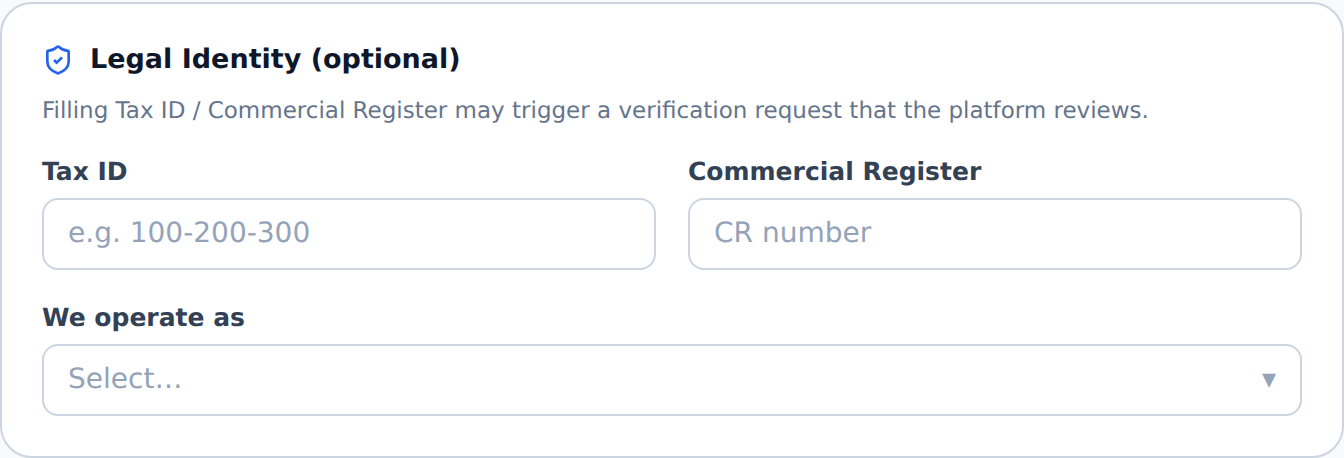
- Tax ID
- The tax number.
- Commercial Register
- The commercial register number.
- We operate as
- The legal entity type — required only if you enable publishing to the directory.
Card four · Company profile and publishing
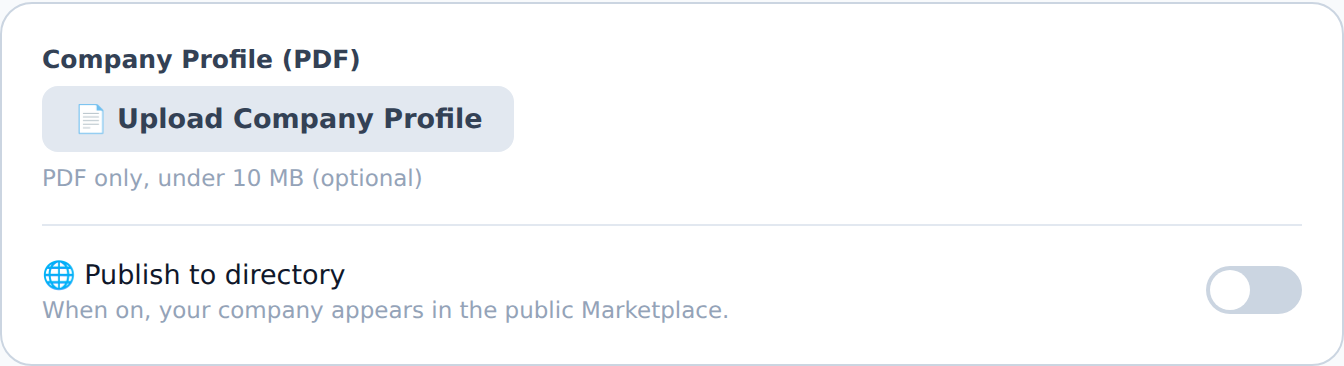
- Company Profile (PDF) (optional)
- Upload the company profile — a PDF under 10 MB.
- Publish to directory
- When enabled, your company appears in the public Marketplace for everyone to find.
Payment and creation
Payment is currently waived during the trial launch period. Finally, click Create my Company (the button is enabled as soon as you enter the name and choose at least one business type), or Cancel to cancel.
09 Roles and permissions: from Owner to Viewer
As soon as you create your company you become its Owner — the highest role in it. This section explains what each role means, how others join your company and gain their roles, and how you appoint an Admin to share management with you.
Roles within the company
- 👑 Owner Owner
- The company’s creator. Holds all admin permissions plus more: legal identity, deleting the company, and permanent notes about employees. A permanent role: it isn’t transferred, revoked, or granted to another member, and the owner cannot resign — the only way out is to delete the company.
- 🛡️ Admin Admin
- Runs the company day to day: the team and roles, HR and payroll, sensitive finance, company settings, and deletion in the library and projects. Does not send recruitment invitations and does not touch what is the owner’s alone.
- 📋 Manager Manager
- Works on the data: adds and edits in the library, projects, tasks, and parties — no deletion and no management of the team or HR.
- 🎯 Recruiter Recruiter
- A specialized role outside project data: searches for candidates, sends invitations, and tracks them only (along with the owner).
- 👁 Viewer Viewer
- Browses all company data without editing — and it is the role every new member starts with when accepting an invitation. They see a 👁 View only — you don't have edit permission banner.
- 🧑💼 Candidate Candidate
- Not a role within a company: it is every user who hasn’t yet joined any company. They own their profile, browse the directory, receive invitations, and can create their own company.
ahmad@engimindai.com): they manage requests, verifications, additions, and shared reference lists, and it is not granted from within the app.How do you become an Owner?
- Open your account and confirm your email (section 03). You enter directly as a Candidate — no one’s approval needed.
- Click Create a Company and fill in the company form (section 08).
- As soon as you click Create my Company, the system registers you as the company’s Owner and makes it your active company, then directs you to its qualification profile.
How do others join your company?
There are no email invitations or join links. Joining happens inside PZone ERP through three steps:
- The person opens their own account (section 03). They become an “open to work” Candidate who appears in search.
- You search for them and invite them: from HR ← Find Candidates (or the link
/find-candidates) open their card and click Invite, then specify the offered position, the salary and its currency, and the response deadline (3, 7, 14, or 30 days). You track your invitations from Sent Invitations and can withdraw them while they’re still pending. - They accept the invitation from their Invitations page (section 07) and join immediately as a Viewer, and your company becomes their active company.
Appointing the Admin and changing members’ roles
- Open HR ← the Users tab (or the link
/users). - On the member’s card, from the Role menu choose the new role: Admin, Manager, Recruiter, or Viewer.
- The change is saved immediately and takes effect from the member’s next sign-in.
- Who changes roles?
- The owner and the admin. The admin can promote a member up to “Admin” like themselves. Your own card is always locked (you can't change your own account), and the “Owner” role is granted to no one.
- Pausing a member temporarily
- Revoke access removes the member from the system immediately and they see a “your access has been temporarily suspended” screen until you click Reactivate.
- Terminating service
- Terminate removes their membership permanently and their tasks move to a replacement you choose (or to the owner). An admin cannot terminate another admin, and the owner is never terminated.
- Resigning
- Any member (except the owner) can leave the company from the My Companies page ← Resign; their tasks move to the owner.
The permissions matrix
| Capability | Owner | Admin | Manager | Recruiter | Viewer |
|---|---|---|---|---|---|
| Browse company data (read) | ✔ | ✔ | ✔ | ✔ | ✔ |
| Library, projects, tasks, and parties — add and edit | ✔ | ✔ | ✔ | ✖ | ✖ |
| Deletion in the library, projects, and tasks | ✔ | ✔ | ✖ | ✖ | ✖ |
| HR: employees, payroll, leave, and assessments | ✔ | ✔ | ✖ | ✖ | ✖ |
| Sensitive finance and e-invoicing | ✔ | ✔ | ✖ | ✖ | ✖ |
| Company settings | ✔ | ✔ | ✖ | ✖ | ✖ |
| Team: changing roles, revoking/restoring access, terminating service | ✔ | ✔ | ✖ | ✖ | ✖ |
| Searching for candidates and sending and withdrawing invitations | ✔ | ✖ | ✖ | ✔ | ✖ |
| Governance and rentals — create and edit | ✔ | ✔ | ◐ | ◐ | ◐ |
| Legal identity · deleting the company · permanent notes about employees | ✔ | ✖ | ✖ | ✖ | ✖ |
✔ available · ✖ not available · ◐ available only if the owner or admin has included them among the “authorized” in governance or rentals (even if their general role is “Viewer”).
A member of more than one company?
A single user can be a member of several companies with a different role in each. From the company switcher in the top bar (your companies) they see their role under each company name and switch between them at any time — and only the role of the active company applies to them. From the bottom of the same list they can always + Create a new company to become its owner.
10 The company qualification profile (Company Qualification Profile)
After you create your company, the system opens this profile automatically to complete it. You always find it from the company switcher ← Company Qualification Profile (reachable by the owner and their assistants), or from a card in My Company Settings. It is a comprehensive self-description of your company (your own data) as a 17-step wizard with auto-save, then approval and signatures sections, and an official PDF export.
The forms list
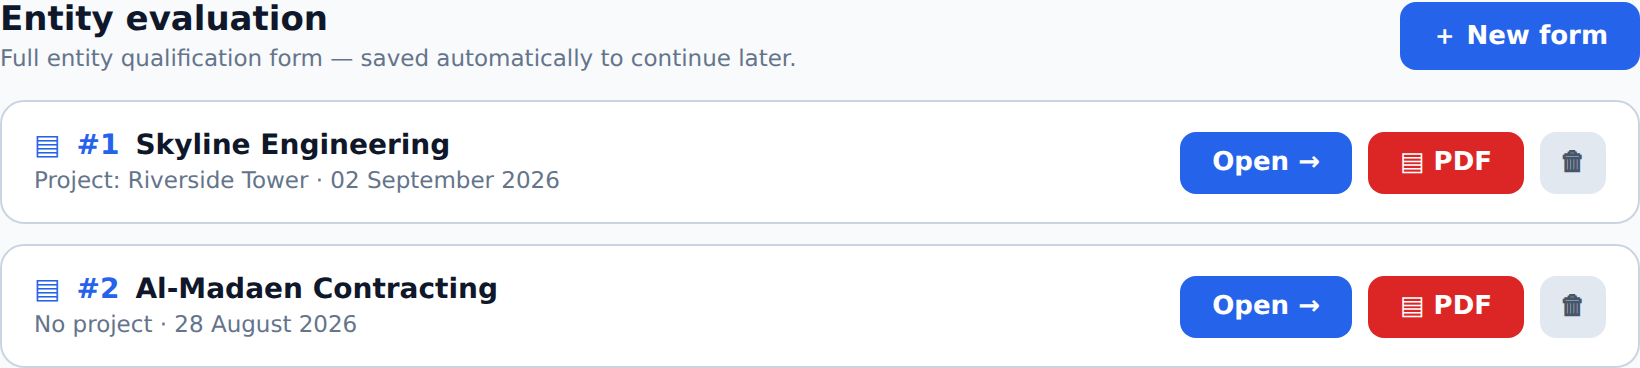
When you open the tab you see your list of forms. Click New form to create a new form, or Open to continue an existing one. Each form has a reference number (#), the entity name, the project and date, a PDF button to export, and a trash bin to delete.
Anatomy of the editor
The editor consists of a top steps bar (clickable to move freely between the 17 steps), the save indicator (Saving / Saved), and a PDF button. Green = a completed step, blue = the current step.
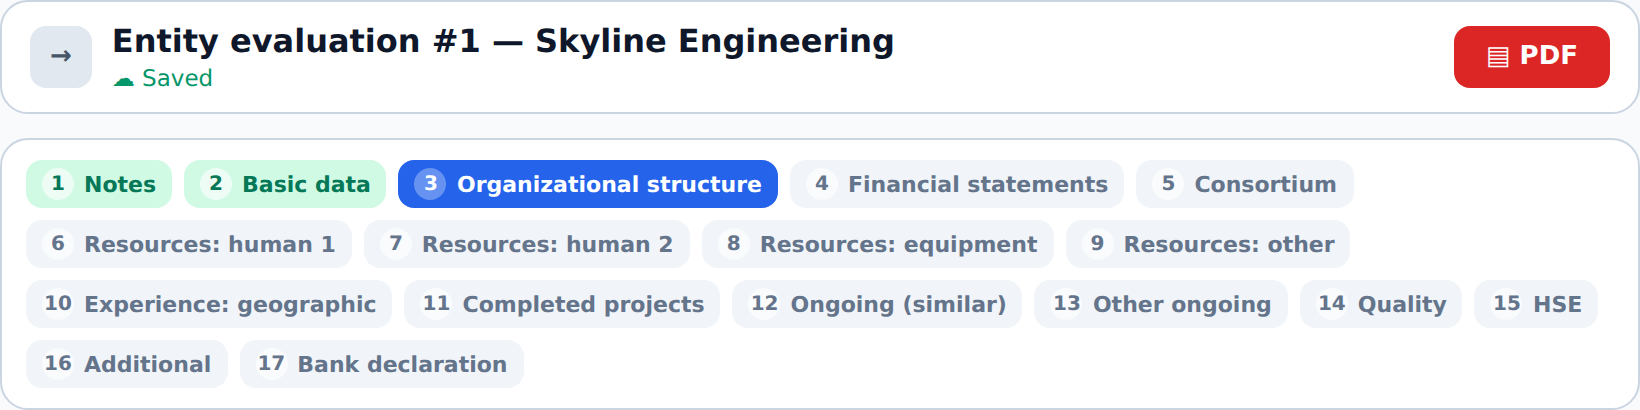
The 17 steps, step by step
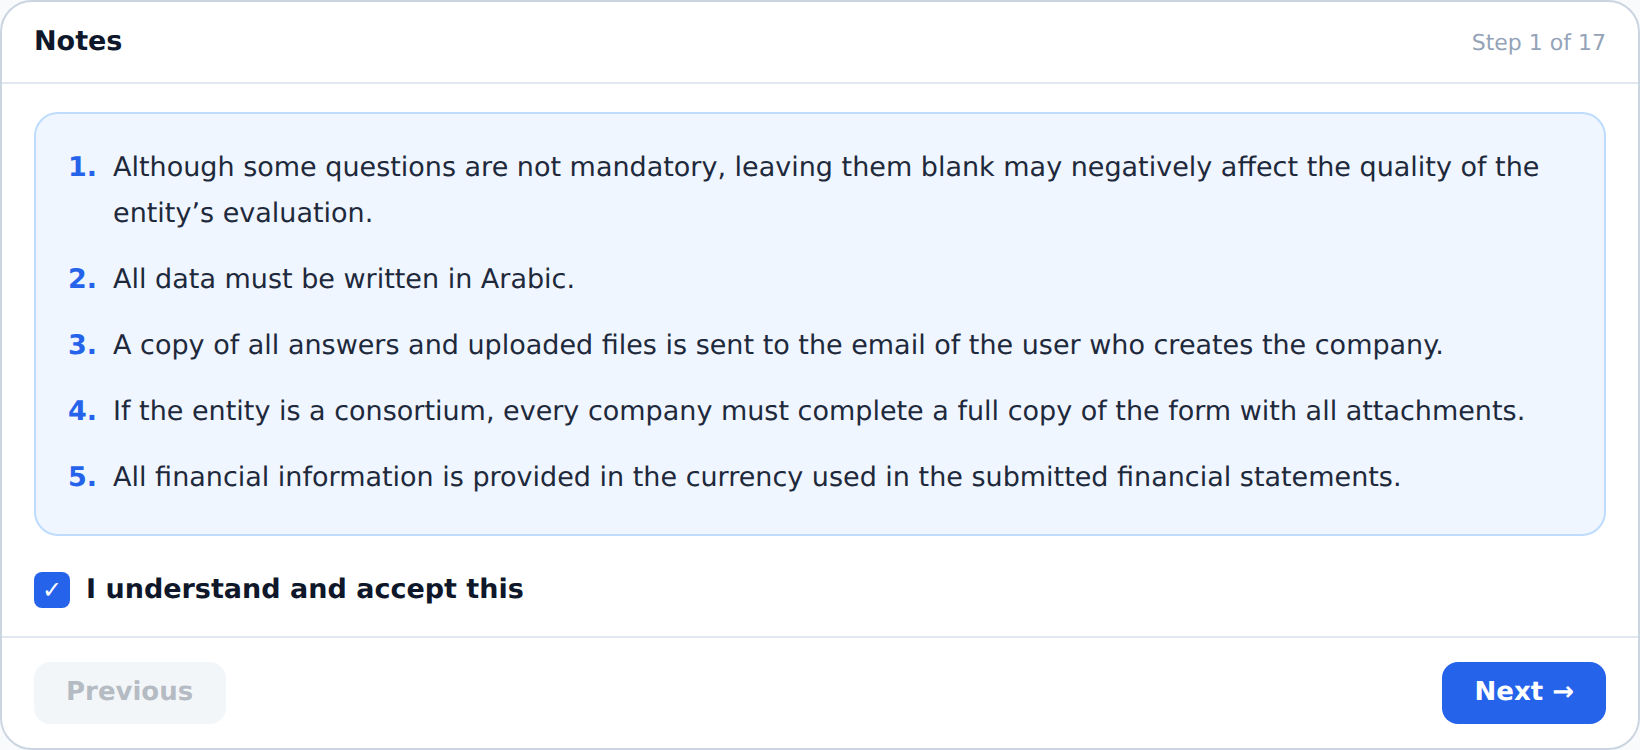
Step 1 · Notes
A mandatory instructions page: it shows 5 important notes (most importantly: all data is written in Arabic, and a copy of the answers and attachments is sent to the email of the company creator). You cannot continue until you enable I understand and accept this.
Step 2 · Basic data
- Owner name
- Your name — prefilled from your profile, and editable (you can type it if it isn’t set in your profile).
- Entity name
- The entity name — prefilled with your company name, and editable.
- Date
- Today’s date (automatic, not changeable).
Step 3 · Organizational structure
- Approved legal postal address
- The approved legal postal address.
- Phone / Fax / Email
- Contact details with the international code (with instant format validation).
- Authorized signatory
- The name and title of the person legally authorized to sign on behalf of the company.
- Company disciplines
- The company’s disciplines (multi-select from the org units).
- Years of experience
- In the country of origin and worldwide.
- The two contractor certificates (for contractors only)
- The registration certificate and the classification certificate from the local federation — they appear only if the company’s classification includes “contractor”.
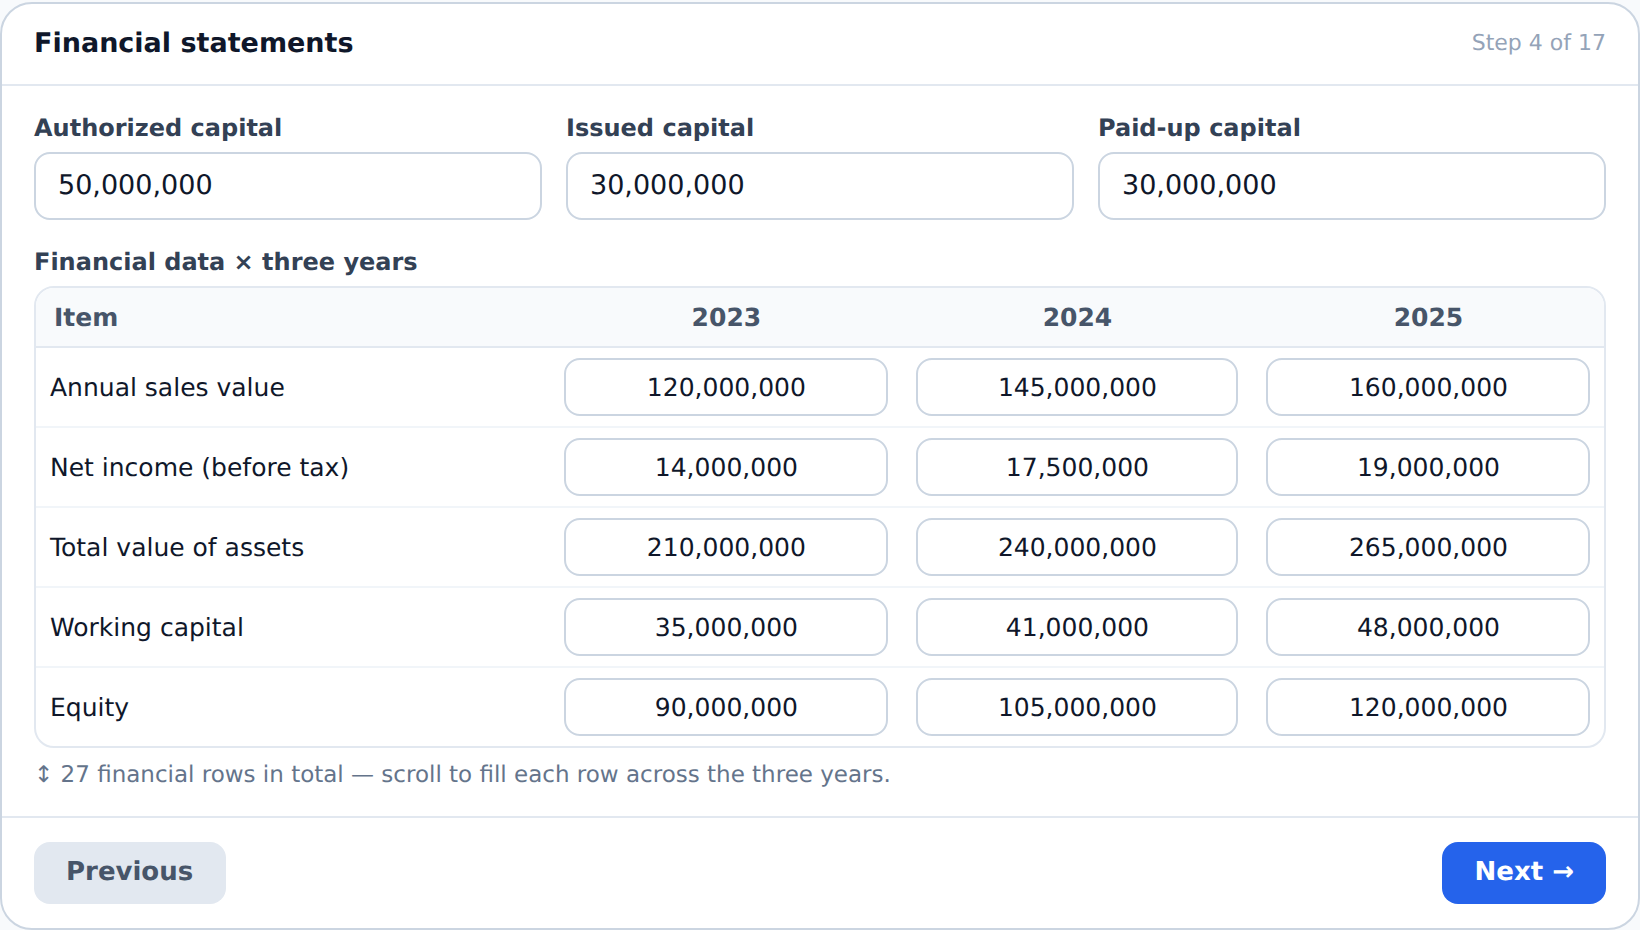
Step 4 · Financial statements
Capital figures (authorized/issued/paid), a table of the value of works executed, and the value of ongoing contracts — then a financial matrix of 27 items across 3 years (sales, net income, assets, working capital, equity… etc.), and the names of reference banks.
Step 5 · Consortium — Form
Filled in only if the company intends to enter a consortium: the names and addresses of the consortium companies, the lead company, the consortium banks, and a copy of the consortium agreement. Otherwise write “not applicable”.
Step 6 · Resources: human 1
- Employee counts
- The number of technical staff and the number of administrative staff at the company.
- Current executive managers
- A table of current executive managers (name, position, years of experience).
Step 7 · Resources: human 2 (proposed project team)
A table of the proposed project team’s data: name, position, experience with the company/in execution, key works, and language ability.
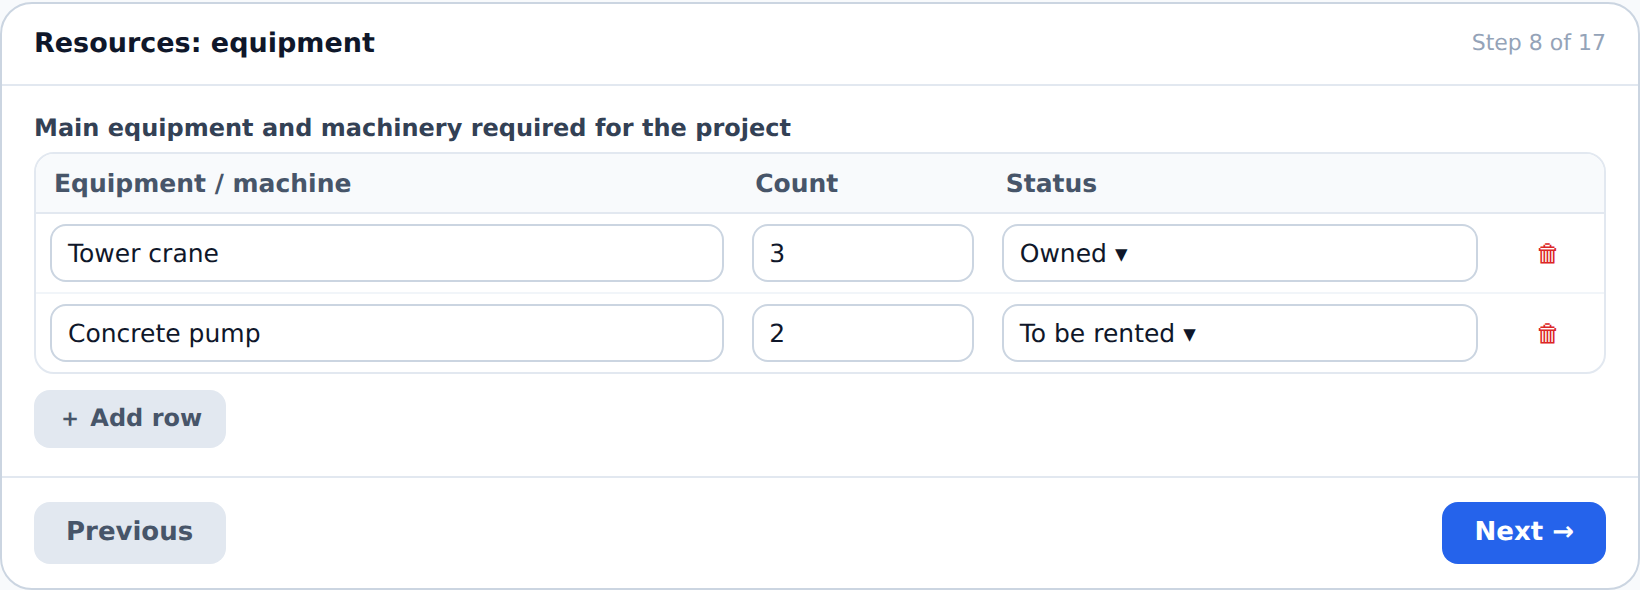
Step 8 · Resources: equipment
A table of the main equipment and machinery required for the project: item, quantity, and status (owned / to be purchased / to be rented). Use Add row to add rows.
Step 9 · Resources: other
Proposed subcontractors, and data on industrial facilities (their description, location, capacity, annual output).
Step 10 · Experience: geographic
The countries where a similar project was executed, and a summary of the company’s experience in the project’s country and neighboring countries.
Steps 11–13 · Experience — project record
- 11 · Completed similar projects
- Over the last 6 years (owner, work description, consultant, contract value, percentage, adherence to schedule).
- 12 · Ongoing similar projects
- Including the actual completion percentage and the expected finish date.
- 13 · Other ongoing projects
- The remaining ongoing, non-similar projects.
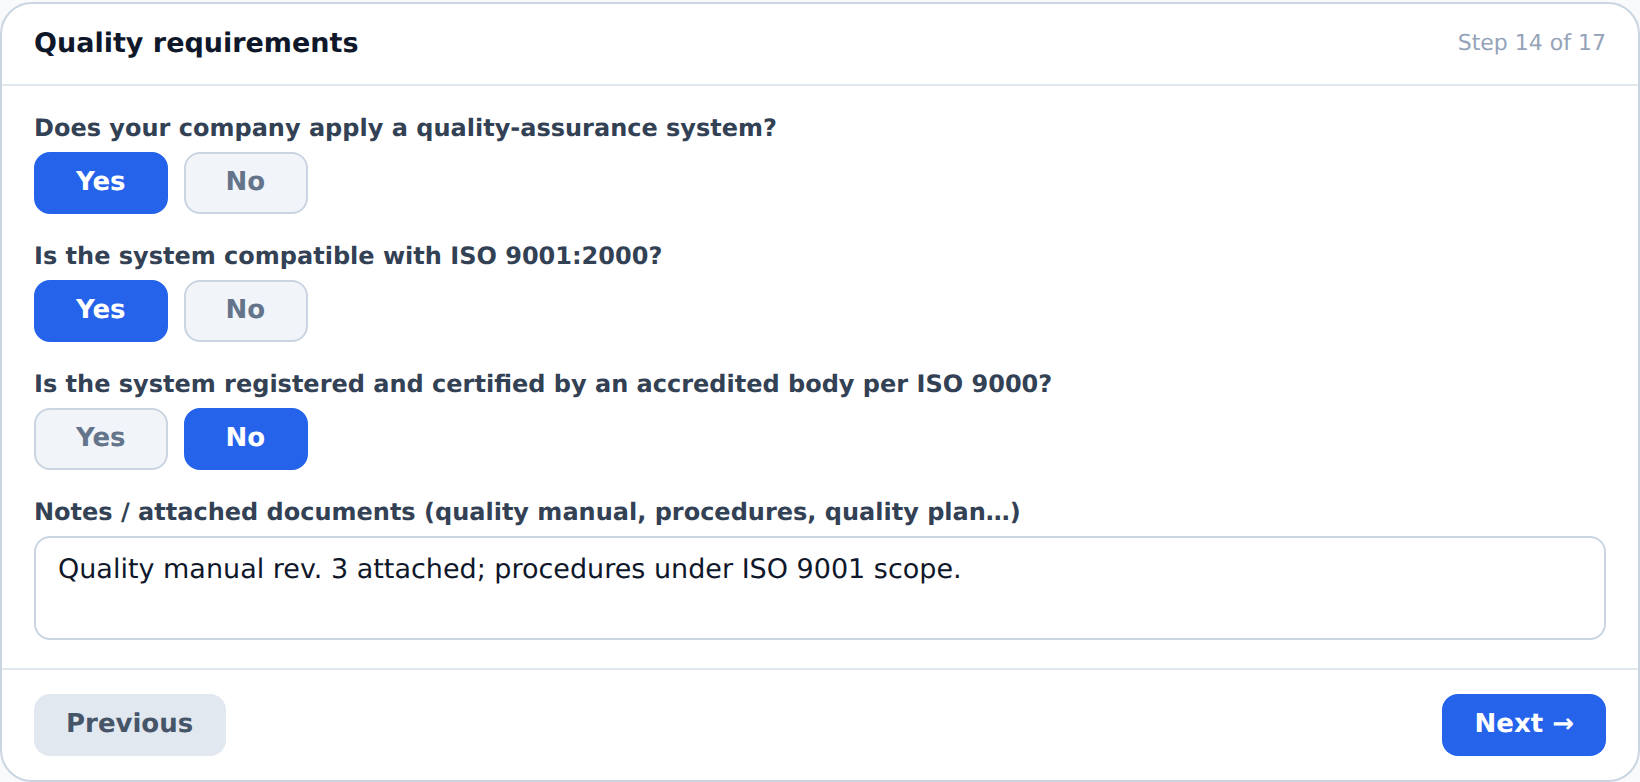
Step 14 · Quality (quality requirements)
Three questions (yes/no): applying a quality assurance system, its conformance with ISO 9001, and its registration with an accredited body — with a notes/documents field.
Step 15 · HSE (health, safety, and environment)
The index of the company’s health, safety, and environment manual.
Step 16 · Additional information
Any other information affecting the company’s assessment (or “not applicable”).
Step 17 · Bank transactions declaration — Appendix
A declaration authorizing the banks to disclose the company’s transactions for qualification purposes: the company name, the authorized party, the project, the declaration’s validity period and expiry date, and the list of banks.
Approval routing
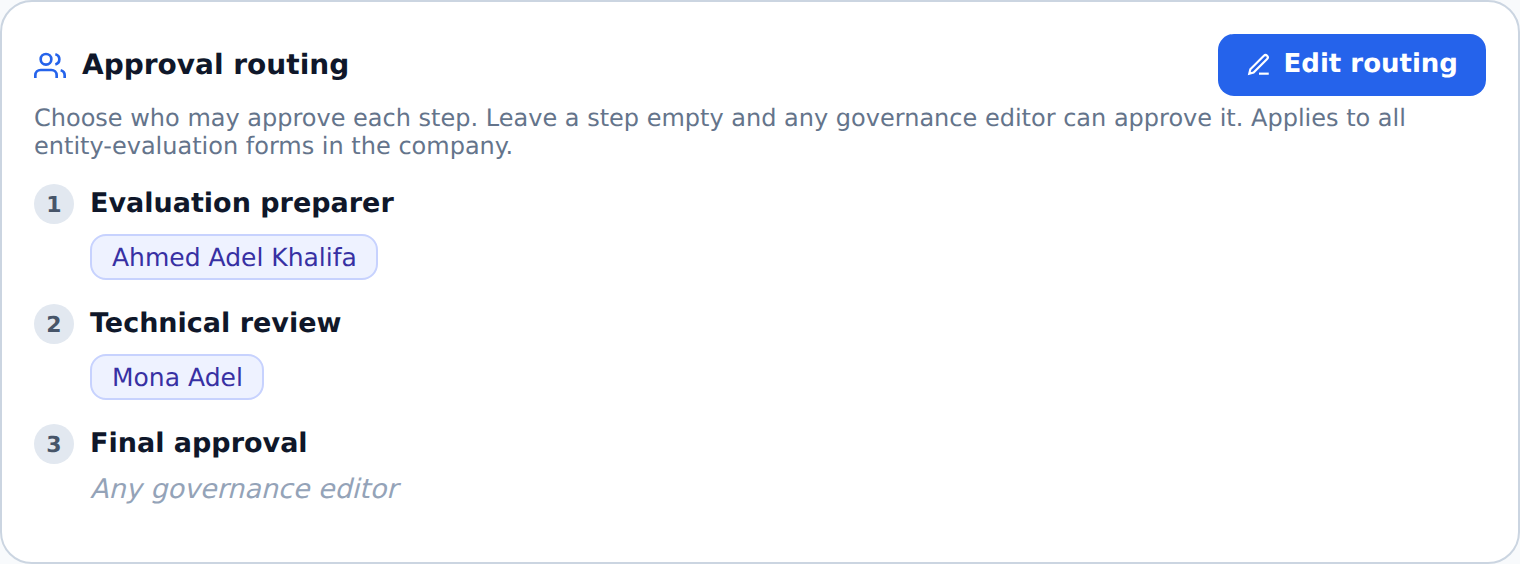
Governance editors (Owner/Admin or the Governance editor) have an Approval routing card directly above the approval section — from it you assign each approval step to a specific employee. Click Edit routing, choose the members for each step, then Save.
- An assigned step
- Only those assigned to it can approve it (enforced by the database) — and the approve button appears disabled for everyone else.
- An empty step
- Approved by any governance editor.
Approval
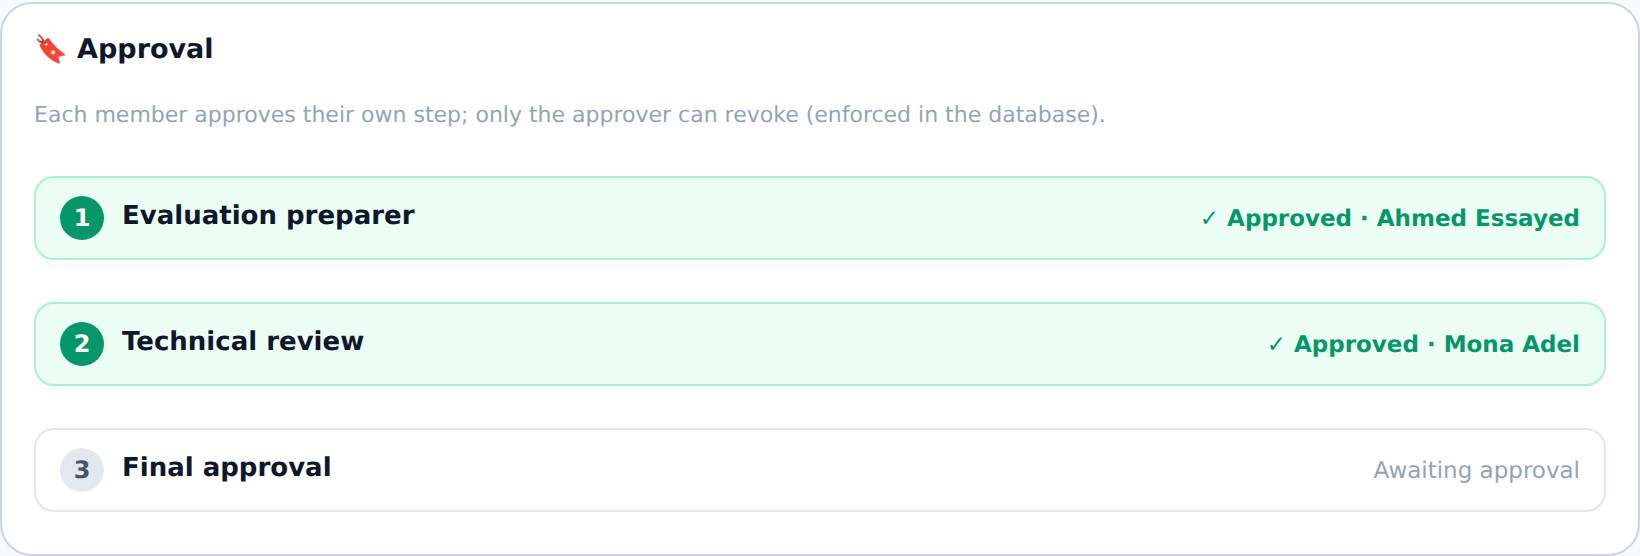
Three approval parties in order: Evaluation preparer ← Technical review ← Final approval. Each member approves their step, and only its owner can un-approve it (enforced by the database). Next to each step the name of the person assigned to it appears (if any).
Signatures
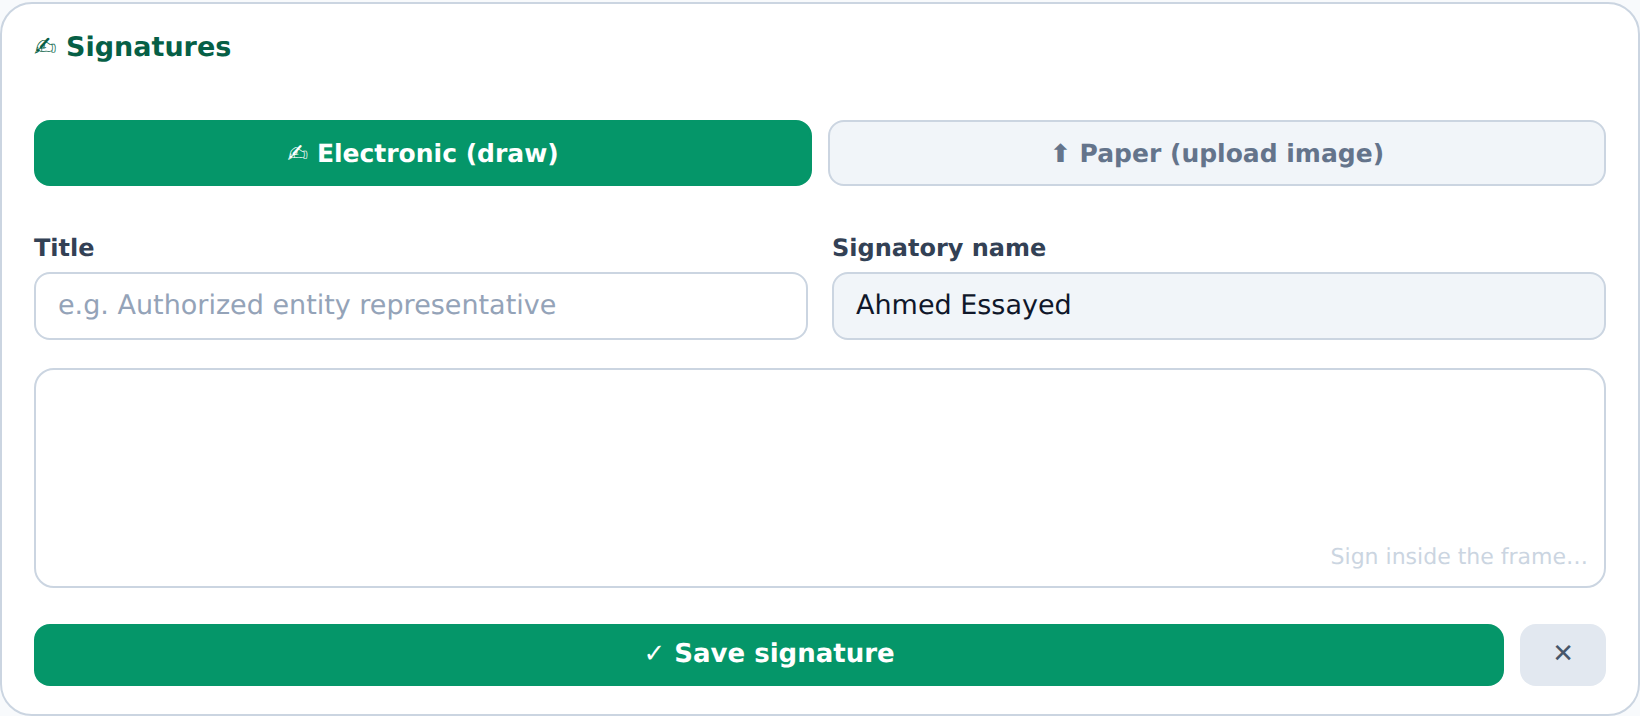
Add one or more signatures — each signature has a Title and a Signatory name — in three ways:
- My saved signatures
- If you registered your signature in your profile, it appears here — click it to apply it in one tap (in your name, electronically). The fastest way.
- Electronic (draw)
- Signing with the digital pen, and it is in your name only. Enable Save to my signatures so it is saved and reused in any other form.
- Paper (upload image)
- Uploading a signature image — used to sign on behalf of another person.
11 Vendor Assessment
Here you assess the vendors you intend to deal with — unlike the previous section (your self-description of your company). You find it from Governance ← the Projects group ← the Vendor assessment tab.
How do you create an assessment? (the “My vendor assessments” view)
- Click New assessment.
- The vendor: choose a company from the directory suggestions, or type any vendor name.
- The criteria: for each of the 7 criteria, enter the score (0–10), and adjust the weight (%) to suit your circumstances.
- The overall result (0–100) and the rating (A/B/C/D) appear instantly.
- Add notes if you like, then click Save.
Enabling this feature requires the platform administrator to set the
ANTHROPIC_API_KEY secret for the server function; before that a “not enabled” message appears.- The seven criteria
- Financial strength · experience and track record · human resources · legal compliance · equipment and facilities · quality · health, safety, and environment.
- The weights
- Standardized as a starting point, but adjustable by you in each assessment according to your priorities.
- The rating
- A (85+) · B (70+) · C (50+) · D (below).
The “Assessments of my company” view (as a vendor)
Switch to this view to see how your clients rated you when they dealt with you as a vendor. The view is read-only:
- Each assessment appears as a card carrying the rating, result, and date and the name of the assessing client.
- Click the card to expand it and see the breakdown of each criterion (weight and score) and the client’s notes.
- Next to the view name, the number of assessments received about your company appears.
- When does it appear to you?
- When the client chooses you from the Marketplace directory and your company was listed on the platform (is_listed), the assessment is linked to your company automatically so you see it here. Assessments of off-platform vendors remain with their assessor only.
12 Individual Assessment
The counterpart to vendor assessment, but for a person: your company — via HR — assesses a candidate or a freelancer you’re considering dealing with. You find it from HR ← the Individual assessment tab (available to the owner/admin/manager).
How do you create an assessment?
- Click New assessment.
- The individual: choose a candidate from the open-to-work directory, or type any name.
- Enter the score (0–10) for each criterion, and adjust the weight (%) according to your priorities — with the two helper cards below.
- The result (0–100) and the rating (A/B/C/D) appear instantly; add notes then Save.
- The seven criteria
- Qualifications and certificates · experience and professional record · skills and competence · references and reputation · accreditation and right to work · discipline and reliability · safety awareness.
- The weights and rating
- Standardized weights adjustable by you; the rating is A (85+) · B (70+) · C (50+) · D (below).
13 Self-assessment: your strengths and improvement opportunities
Unlike vendor and individual assessment (sections 11 and 12) with which you assess other parties, self-assessment assesses your own profile and your company’s profile automatically from the data you entered — showing your score, your strengths, and what should be completed to raise your score.
- Where you find it
- For the user: on the My profile page — the “profile self-assessment” card. For the company: in the company qualification profile — the “company profile self-assessment” card.
- How it works
- It reads the data you actually entered, computes a score for each criterion, then an overall score (0–100) and an A/B/C/D rating, and automatically classifies the criteria into strengths (the high ones) and improvement opportunities (the low ones) with advice for each opportunity.
- Profile criteria
- Identity and contact · specialty · experience · professional bio · CV · certificates · countries of work · public visibility.
- Company criteria
- Company identity · legal identity (tax number/commercial register) · online presence and listing · disciplines · business types · geographic coverage · project record · financial data · team and staff · quality and safety.
- PDF report
- The Export PDF button exports an elegant report with the rating, criteria score bars, and the two lists of strengths and improvement opportunities with the advice — suitable for printing or sending.
- A standard, adjustable system
- The standard weights are ready by default, and the owner/admin can set the weight of each criterion from Company Settings ← “assessment criteria and their weights” (the profile rubric and the company rubric) — and it is reflected on the scores immediately.